|
Painting large clouds.
In today's blog I want to go over how to paint the easiest clouds when starting out. I get many questions everyday about how to paint cloud. So I thought I would start off with the easiest way first. In the video above is a clip where I show this easy method. All you need is a 2" Landscape brush. or a 1" Landscape brush. And use one corner to tap into some Titanium White. Remember when painting leaf trees blog? when we just tapped the brush into the paint and could see all the little bushes in the paint on the palette? This is the same technique! After loading your brush go tot he canvas and think of a basic cloud shape. And then just tap it on, using one corner. After painting your cloud take a clean 1" landscape brush and blend out the base, then fluff it up using a soft upward motion. You can use the Hake brush for this to make it really soft and its a lot easier to use.
0 Comments
Need your painting to have more distance? or maybe you need to cover something up? In this blog I want to go over how to paint a basic dead tree or a tree without leaves. OK so in the clip above You can see how I painted the large tree but I want to over more in the blog. You need to use a dark color if its in the foreground lighter color if its in the background. But we are focused on the big large tree like the one in the video. If you haven't used the palette knife very much or just want more control I recommend using the #6 Filbert Brush. Load it in a dark color black will work. And then make a large tree trunk slightly smaller on the top and larger at the base give it a little curve as you go, this will give it character and make that happy buck! Next you will need to add a highlight to the tree. Mix up a gray brown color then load a roll on the knife. Now on the outer edge of the tree trunk ( where ever your light is coming from ) And tap the knife and move up and down and then to the middle of the tree. This will allow it to blend back to the shadow. Next make a lighter color ( just add more white to the gray mixture ) Then tap right where you want the light to strike. *** TIP*** Only touch the color do not over work it! Next thin down the black with some Amazing Clear medium With a #2 script liner brush. To a sharp point by spinning into the paint. Next add your limbs. You can shake your hand or pull put some limbs. Check out the video above. If you want to do this for the distance just use lighter colors.
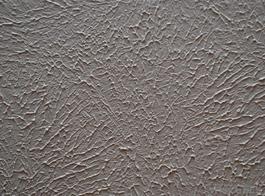
In a post we made a week ago we made a blog about highlighting bushes. So how do you highlight leaf trees? This technique can be used to highlight bushes and is just about the way I paint my bushes 80% of the time, because I just love the way it looks. So lets get started! In this small clip you can see how I layout the highlights by taping on the leaves. But how do you load the brush? You want to load the brush in the highlight color you choose, but load it into a crunched brush which is by just taping or crunching the brush into the paint. Your paint should be thinned down with a touch of Amazing White medium to make the paint creamy. You should see little bushes in the paint when your highlighting or a little pull. This is how you know your brush is loaded right here is little photo of a textured ceiling. And this is something common in most houses. So take a look up. That's what your paint should look like on your palette. Here is a little photo of a textured ceiling.
Need to add a cabin to your landscape? In this blog I want to go over with you the basics of laying out your cabin or even a barn! The first problems I see when folks paint cabins is the roof. They make the roof even all the way across or they have the front uneven. So what is the easiest way to layout a basic cabin. First I recommend to draw a basic cabin shape on paper. Do this as many times as you like until you feel comfortable with the shape you make. **TIP** When drawing out your cabin make the front top of the roof a little higher than the back end. This will give it distance. OK now that you have made about 100 cabin sketches on some paper do the same on the painting. Take your #10 Magic Palette Knife and use just the tip of the blade the same way you used the pencil or pen when you was sketching it on paper. After you get the cabin sketch in now you can scratch out the inside. Doing this will remove extra paint that can cause you problems. Feel the inside areas with a dark mixture, if your making a woods seen dark brown is best. If its a winter seen a gray dark blue is best. To add highlights to it just add white to the dark color to make a lighter mixture.Next is your roof. Highlighting the roof is different to each. You will need to decide how you want your roof to look . To make a tin roof just make a light gray and add it to your roof. Do you want a shingle roof? feel it with a dark gray color then to make a highlight color just mix white to the dark gray color, then take the small end of your knife and load a roll of the light color you mixed and start at the bottom of the roof and dab down. Do this for each shingle working up. To make a door just load black to the small end of the knife pull down a door you can do this for windows too. *** TIP*** Make sure you make the windows the same height as the door. Watch the clip of Brandon painting a simple cabin. I hope you enjoyed this blog post and tomorrow we will go over another panting tip!!
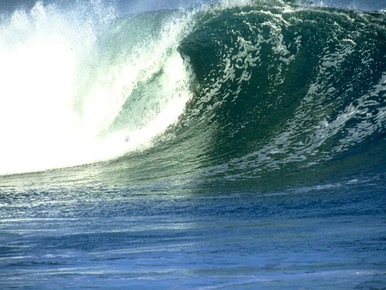
Shaping a wave is the most important part besides the foam pattern. The shaping of the wave sets the guide for the foam and makes it easier to layout your foam. So how do you shape a wave? When shaping a wave you want to use 3 different color tones. This giving it movement. Have you ever been to the beach and seen the sun playing on the water? If you have you can see multiple colors and that's how you can see all the movements in the water. So when we are trying to make a wave or ocean water realistic we need to use multiple colors to make the water move. Take a look at the clip. Brandon shows you have to shape a wave to get the water moving and ready to layout the foam. He also uses his filbert brush to paint the tones in the same direction he wants the water to move in and the same way he will paint in the foam. Your bushes looking like a mudslide?
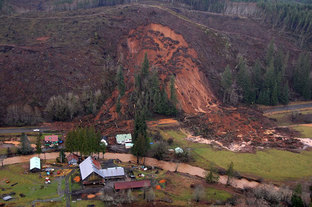
push the brush slightly into the canvas. With a lot of paint loaded in the brush to a dog paw ( a rounded edge ) with some Amazing White medium. And he is barely putting that brush to the canvas. Another common reason for getting mud is getting the paint to thin adding to much Amazing White medium. You only want the paint to have a little pull to it. So when adding Amazing White medium just add a little at a time until the paint becomes creamy not thin you should feel a little pull when loading the brush. Another common reason for a "mudslide" is using your wrist to push the brush into the canvas this causes your brush to move up and will make a smear or a "mudslide" remember to keep the brush firm and loaded with a lot of paint. Most beginners load their brushes with very little paint not wanting to waste it because it cost so much. But remember your paint will work for you as long as you use it! So add some paint to your palette and get MONKEY FACED ON IT!!
Brandon is a nut for painting mountains. Many people ask how can I paint mountains like him? We took one of Brandon's videos and cut the mountain part out and made it, its own video. So you can just focus on the mountain part. This is just a short clip so you can focus on how Brandon painted the mountain.
When painting your mountain you need grip so painting mountains go back to the prep,before you start painting your sky. You want to use Amazing White to coat your canvas. Other white base coats will not give you the grip you need. Other white base coats will not let your paint stick and this making it almost impossible to break paint across the mountain. Brandon designed his white base coat to get tacky and give grip so highlighting mountains will be a lot easier. Now on to the mountain! when mixing your mountain base color you want to use a dark color. This way your highlights pop off the canvas. Now if you want a distance mountain use a light base for the mountain by just adding Titanium White to the mixture. Here is the Mixture 1 part Prussian Blue or Thalo Blue : 1 part Ivory Black : 1 part Alizarin Crimson: If you want this to be a distance mountain add 1 part - 2 parts Titanium White. The more Titanium White the more your mountain will be in the distance. Load a roll to the palette knife and with firm pressure push in your mountain. Scraping the color as you go. After you layout your mountain take a 2" or 1" Landscape brush and pull out the mountain. This will help your highlights and shadows stick better. Highlighting: When highlighting you want to use a good size roll of Titanium White paint when starting out, this will make it a lot easier for you to get the paint to break. Now with no pressure think like your sliding on ice just let the paint touch the canvas and then give it a little pull. !!!!WARNING!!!! make sure your index finger is !!NOT!! on the back of the handle of blade this will cause your paint to not break even if you are using no pressure it will not break!! After adding your highlights add the shadow Shadow color mixture: 1 part Titanium White: 1 part Prussian or thalo blue: If you want the shadow to be toned down add a touch of burnt umber. Then just like when highlighting the mountain do the same to the shadow side. After adding both the highlights and the shadows. Take the 2" Landscape brush and crunch the base out. this will create mist. |
AuthorBrandon Thomas, CategoriesArchives
August 2021
Categories |


 RSS Feed
